
SET FILTER CYCLE TIME
Follow these steps to set the start time of filter cycle 1:
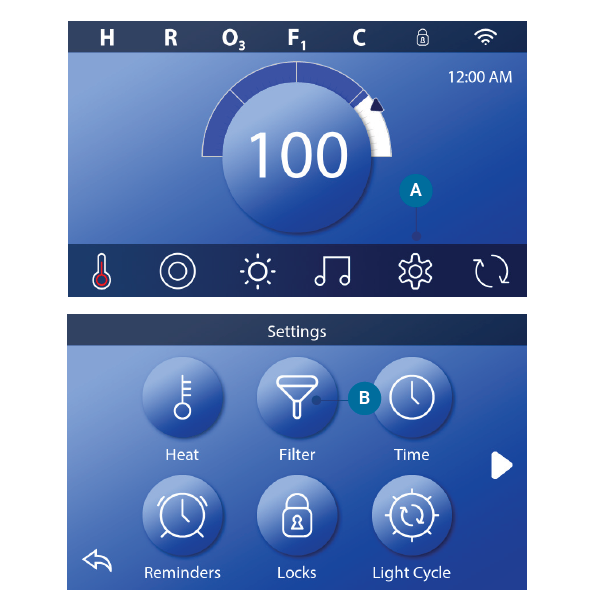
1 – Press the Settings button (A) on the Main screen.
2 – Press the Filter button (B) on the Settings screen
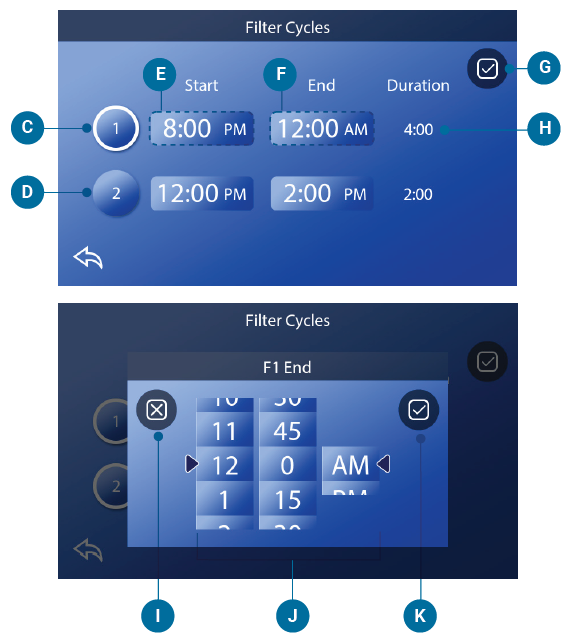
3 – Press the Start button (E) on the Filter Cycles screen.
4 – Set the Start Time with these dials ( J ) on the
F1 End screen.
5 – Press the Save button ( K ) to save your settings, or
press the Cancel button ( I ) to cancel your settings.
6 – Press the End button (F) on the Filter Cycles screen,
and follow the same steps to set the End Time.
7 – Once the Start and End Times are set, press the Save
button (G) on the Filter Cycles screen.
8 – Once Start and End Times are set, the Duration
appears here (H). You have now set the time for
Filter Cycle 1. The white ring (C) indicates that Filter
Cycle 1 is enabled (it is always enabled).“F2” appears here (A) when filter cycle 2 is running.
Follow the same steps noted above to set the time for
Filter Cycle 2.
How can you tell if Filter Cycle 2 is enabled?
Filter Cycle 2 is enabled when a white ring appears around the button. For example, Filter Cycle 1 is enabled (C) in this screen, and Filter Cycle 2 is disabled (D). Press the button to enable/disable Filter Cycle 2. A Filter Cycle 2 will only run if it is enabled.
Note: It is possible to overlap Filter Cycle 1 and Filter Cycle 2, which will shorten overall filtration by the overlap amount.